Canning Soup – Split Pea With Ham Recipe
Makes 10 Pints – Easy Split Pea Soup With Ham for Beginner Canners
This is one of my most favorite soups – Split Pea With Ham. And if you’re like me and grew up on the store bought brand and really liked it, then you’re just going to flip over this homemade soup and never go back to Campbells or Progresso. I started making this years ago and even the hubs gave me rave revues (lesson learned – add salt). And now that I’ve discovered the canning recipe we usually have a bunch of jars sitting on the shelves.
So check it out – it’s not hard to make. The only time consuming part of this recipe is chopping up the onions, celery and carrots. But do yourself a favor – get a food processor. You won’t regret it.
If you grow your own vegetables, grow your own fruit, or raise your own livestock, then I’m sure you already know of the rewards and benefits of having homegrown food at your fingertips. But what if you’re just getting started and are looking for ways to preserve every bit of produce you’ve toiled over the past spring, summer, and fall? If this is you (and it was me) then you have to check out this Canning Soup – Split Pea and Ham Recipe. It’s so easy even a beginner canner should have no problem making this delicious dish.
Split Pea Soup With Ham
thank you canningandcookingathome and sbcanning for the recipe base
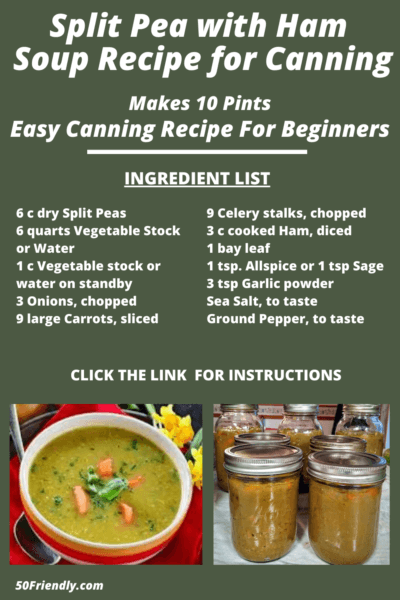
Ingredients
6 c Split Peas (dried)
6 quarts Vegetable Stock or Water (I used water)
1 c Vegetable stock or water on standby
3 Onions, chopped
9 large Carrots, sliced
9 Celery stalks, chopped
3 c cooked Ham, diced
1 bay leaf
1 tsp. Allspice or 1 tsp Sage
3 tsp Garlic powder
Sea Salt, to taste
Ground Pepper, to taste (I use LOTS)
Instructions
Pick out any rocks from the dry peas and then rinse, drain, and put them in a large pot with vegetable stock or water. Bring to a boil, reduce the heat and simmer for 45 minutes, or until the peas are soft. I tried covering the pot but it kept boiling over, so just lightly cover and you’ll be fine.
Sterilize your jars, the lids and rings, which I do in my dishwasher and then keep there so they stay warm until ready to use. I also add the required water to my pressure canner, get the water to a nice hot temperature and ready for the jars.
While the peas are cooking – now’s the time to chop up all vegetables. In another pot or large pan, saute the onions, celery, and carrots in a bit of olive oil until the onions are tender. These will be added to the pea pot later.
Once the peas have simmered they should be really soft. Add the sauted vegetables to the cooked split pea pot, along with the chopped ham, allspice, garlic powder, salt and pepper. Mix thoroughly and cook for another 15 minutes. It’s at this point when you may want to add additional broth or water to the soup – depending on your preference. I added another cup of water.
If you want blended vegetables in your soup, you can also take half of the soup mixture (not all at once) and run it through a food processor or a blender. Add it back to the soup pot and mix together. Or if you want your soup to be entirely smooth, use an immersion blender directly in stockpot and blend it all up. I personally like a bit of chunks in my split pea soup.
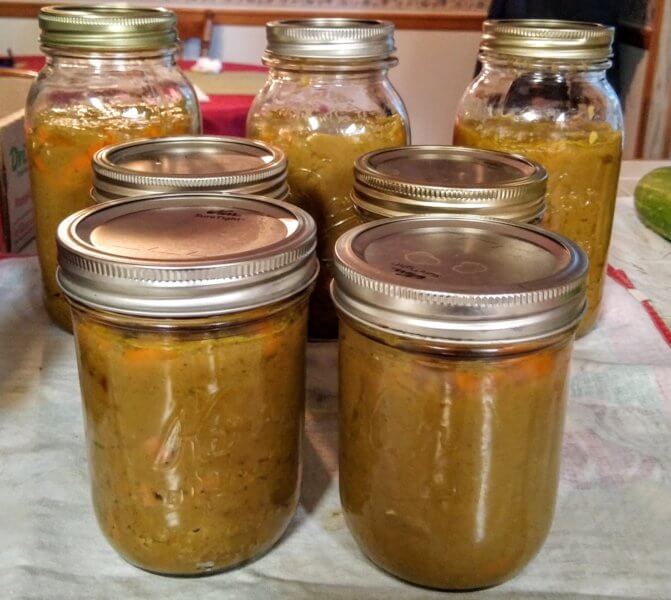
FILL THE JARS, PRESSURE COOK, AND WAIT FOR THE PINGS !
Time to fill the jars – Ladle the soup out of the pot and fill the jars leaving a 1″ headspace.
Wipe edges of jar rims clean, place a sterilized lid on top, and hand tighten it close with a ring. Place each jar on top of the rack inside the canner, seal, and pressure can the PINTS at 10lbs pressure for 75 minutes. If you’ve filled QUART JARS – pressure can at 10lbs pressure for 90 minutes. Once done carefully remove the canner from the heat and let the pressure release on its own – mine takes 30 minutes. Then open the canner lid, remove the jars and place them on a kitchen towel to cool. And there you have it – pretty easy and straight forward.