Chili Con Carne Canning Recipe
Makes 22 Pints of Canned Chili Con Carne
If you grow your own vegetables, grow your own fruit, or raise your own livestock, then I’m sure you already know of the rewards and benefits of having homegrown food at your fingertips. But what if you’re just getting started and are looking for ways to preserve every bit of produce you’ve toiled over the past spring, summer, and fall? If this is you (and it was me) then you have to check out this easy to make Chili Con Carne Canning Recipe. It’s so easy even a beginner canner should have no problem making this delicious dish.
Chili Con Carne Canning Recipe. This recipe was a doozie as it took me 3 batches to process all the chili in the pressure canner. It wasn’t hard, actually it was quite simple once the recipe was made. But unless you’re a nocturnal person – of which I AM NOT, then I would highly suggest starting this recipe in the morning so you’re not up until midnight waiting for the last batch to finish.
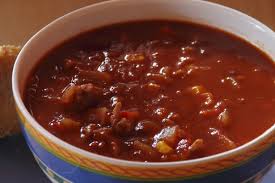
Seeing this recipe made two big pots of chili con carne, the hubs and I did a taste test while the first batch was being processed in the pressure canner, and I will straight up tell you – hot damn this chili is so good. It has a bit of a bite to it – not too strong as even I was able to enjoy my food. And because we were both having bowls before it had been processed in the pressure canner, the beans were not as soft as we’d like. But just keep in mind, once the jars are processed in the the canner, the beans will soften up just fine. We served the chili over rice, topped it with some cheddar cheese and a dollop of sour cream – and YUMMY !!!! So check it out, don’t get intimidated by all the ingredients, and see how easy it is to make and preserve. Plus if you don’t want 24 pints, just half the recipe.
If you ever get caught sleeping at the kitchen table after canning all day and night – just slowly raise your head and say
“In Jesus’ name I pray”
There were a couple adjustments that I made to this recipe – first was I did not cook the ground beef in any oil as there’s enough fat in the meat to prevent it from burning. It was also easier for me to cook the meat in two batches. 2) I did a combination of the two beans – using 1 1/2 pounds of Kidney Beans and 1 1/2 pounds of Pinto Beans. 3) a third of a cup of chili powder really scared me so I only used 1/4 cup. So depending on how much heat you can take – use your own preference when it comes to the chili powder. GOOD LUCK AND ENJOY 🙂
PREPARE THE INGREDIENTS, FILL THE JARS, PRESSURE COOK, AND WAIT FOR THE PINGS !
Chili Con Carne Canning Recipe
compliments of the daringgourmet – thank you
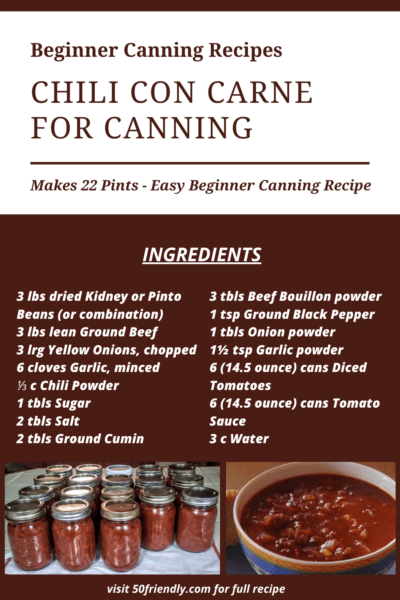
Ingredients
3 pounds dried Kidney or Pinto Beans (or combination), soaked overnight then drained and rinsed
3 pounds lean ground beef
3 large yellow onions, chopped
6 cloves garlic, minced
⅓ cup chili powder
1 tablespoon sugar
2 tablespoons salt
2 tablespoons ground cumin
3 tablespoons beef bouillon granules/powder
1 teaspoon freshly ground black pepper
1 tablespoon onion powder
1½ teaspoons garlic powder
6 (14.5 ounce) cans diced tomatoes
6 (14.5 ounce) cans tomato sauce
3 cups water
Instructions
Drain and rinse the beans you had soaking overnight, place them in clean water in a large pot and bring to a boil, reduce the heat, and simmer for 30 min. Drain, rinse and set aside.
While beans are cooking, prepare your canning supplies – sterilize your jars, the lids and rings, which I do in my dishwasher and then keep there so they stay warm until ready to use. I also add the required water to my pressure canner, get the water to a nice hot temperature and ready for the jars.
Brown the ground beef in a large stock pot (you may have to do two batches). Once done, drain off all the fat from the meat. Put beef back in your pot and add the onions and garlic and cook for 6-8 minutes.
Add all the seasonings and cook for a minute. Then add all the remaining ingredients and bring the chili to a boil. Reduce the heat and simmer for 5 minutes.
Ladle the Chili Con Carne into your hot jars leaving a 1″ headspace. Wipe edges of jar rims clean, place a sterilized lid on top, and hand tighten it closed with a ring. Place each jar on top of the rack inside the canner, seal, and pressure can the PINTS at 10lbs pressure for 75 minutes. If you’ve filled QUART JARS – pressure can at 10lbs pressure for 90 minutes. Once done carefully remove the canner from the heat and let the pressure release on its own – mine takes 30 minutes. Then open the canner lid, remove the jars and place them on a kitchen towel to cool. And there you have it – pretty easy and straight forward.